This is the reference image I chose to re-design
In doing this interpretation
Doing the
Maya experiment I had decided that I could also do a 3D artist interpretation,
my reference image included circular pillars but instead as a test I used a
cube and extruded it. After I was happy with it I used the cylinder shape and
extruded that. With help from my tutor (Chris) using the multi-cut tool he
selected a section and then extruded that out to make the indents
Over the course
of me making the interpretation I took screen shots to show my progress along
the way of making the gravestone
this is as far as I've got with My experiment as of yet. When doing this there has been mistakes that I, myself have done then re-corrected. one of which was the top part of the right pillar was going out instead of in, so I deleted that pillar itself and started again.
Step-by-step:
-First a had found an image that I wanted to recreate from an artist I had researched
- I took that image into Photoshop and created a reference image for me to use in Maya
- Then in Maya I went to file selected "Project window" Then went into my hard drive and selected for the project window to be saved within there
- Once that had been done I went on to "Set Project" and Selected the folder i had named the which was "Alex Guillen Artist Interpretation"
-To insert my reference image, I Saved the image in a folder called "Source images" and then "reference Image"
-In Maya to insert the image I went "edit" and clicked "free image plane" from there I selected the free image plane, then selected the "Attribute Editor" in that you would select the folder and then go to the "source images" and select the picture i had created
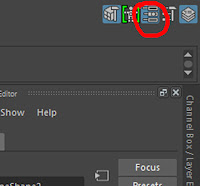
- I Clicked the button that is highlighted which created a new layer and assigned my free image plane to it.
- Clicking the button with 'R' in it that makes the image plane a reference meaning I can't select it or move it keeping it frozen so I'm able to use it.
- I originally chose the Square tool but the original image was circular so I chose the Cylinder tool
- The "subdivisions cap scroller changes the number of faces you can select on the mesh
- This is what it looks like with the subdivision cap at 0, meaning its easier to select the face i want to extrude
- After that using the "W" and "R" Keys on the keyboard I was able to move the cylinder and change the size to fit the reference image
- The image above also shows that I've begun to extrude the cylinder only selecting the face by holding down right click meaning I can select only one face to an object. with Extruding i clicked the Red block then the centre block bringing the face in equally.


Please include a reference image of the artist work to illustrate your points.
ReplyDeleteHow can you now develop this work now you have learn't these Maya skills.
ReplyDeleteWhat is this model, explain what it is.
ReplyDelete