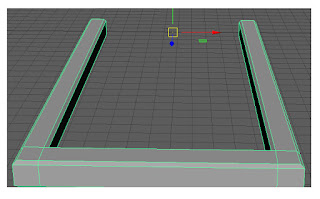
After Uv-ing all my
pieces, selecting the edges and sewing them together to hold “Shift + Right click”
which enabled me to unfold the objects; this is the final of it.
The process in my
opinion was simple because it was repeating the steps over and over. First I would
choose the object I wanted to UV first and select it. To isolate it I would
hide the un-selected objects by pressing “Alt + H”
Now I can only see
the object I want to UV the next step is to go to the UV tab, go to planar and
click the little box, once that has been completed it’s time to start UV-ing. I
decided to do the top first so I selected all the top faces and then went into
the planar box and mad
e it so it was perfect for the UV axis.
Next I done the
sides so I went into the side orthographic view dragged a box within the shape
to select the other sides also and done the same process with the planar box
but on the “X” axis
After the sides were
done I done the front of the shape so as before dragged a box within the shape
so it only selects those faces and then done the same process but on the “Z” axis
So now as the whole
shape has been UV-ed It’s now time to create it as one net, so to select the
edges hold “Right click” and select edge, going over the edges I'm able to see
which ones should connect because it’s partner will also be highlighted red, so
I clicked the edge and then held “shift + right click” and selected “move and
sew UV’s” After I held "Right Click" and then select the "UV" tab double click the sewed shape hold "shift + Right Click" and select unfold
Now to bring back
the hidden mesh’s simply press “Ctrl + Shift + H” select another mesh and as
before hit “Alt + H”
In the side
orthographic view as I did with the other shape I dragged a box in within the
shape selecting both sides of the shape. Then as before in the planar mapping
options box I UV-ed it on the “X” axis
In the Front
orthographic view as with all the other shapes; I dragged a box within the
shape and then in the Planar mapping box UV it on the “Z” axis.
After that I done
the top of the post and as before joined the edges that connected together and
the top, unfolded the net by selecting the UV’s and pressing “Shift + Right
click” then selecting unfold
As there was another
post but the net would be the same I duplicated the net. Left is the headstone and Jack Daniels bottle
So; as before I held
“right click” selected the faces of the headstone. And in the planar options
box UV-ed it on the “Z” axis
I done the Exact
same on this top (top of the gravestone and the lip) then done the sides and
bottom.
Once more, joined
all the edges and then by selecting the UV’s and holding “Shift + Right click” and unfold
Now the Jack Daniels
bottle, something I struggled with this one is that I crated with two shapes. Meaning
two different UV shapes and nets
So once more
selected all the front faces to the bottom half of the bottle and in the planar
box options and select the “Y” axis
Like the posts as is
the same each side it looked the same and the bottom of the bottle in their
respected orthographic view and in the UV editor joined up all the edges and
unfolded them
For the top of the
bottle I did struggle with UV-ing it because of it being designed with Cylinder
mesh so I wasn't really able to figure out which were the front and side faces
and which weren't UV-ed and which were but I was able to get it done and joined
the edges finally unfolded it by using the “shift + Right click” and select
unfold


